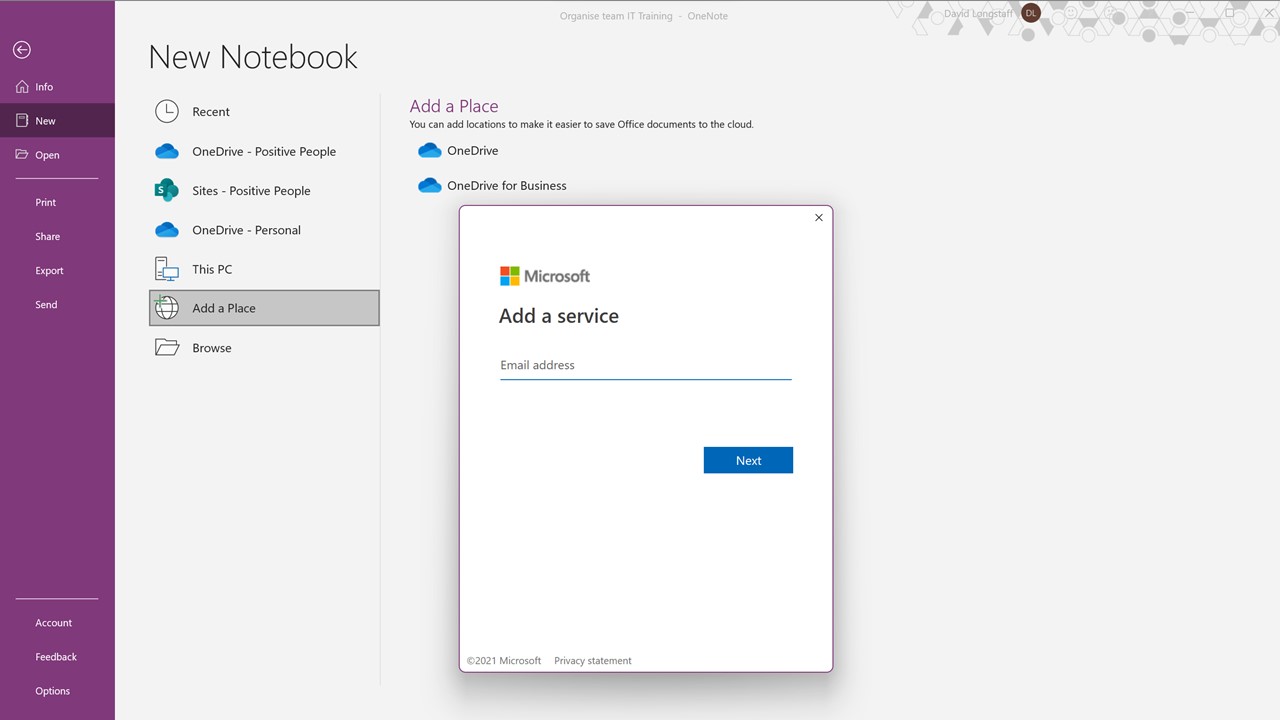
OneNote is available on all major platforms; and has very similar functionality in each version. The first thing you may need to do is log in using either an organisation or education account or a free Microsoft account for personal notebooks (Image 1).
Note: there are 2 versions of OneNote for Windows computers; I recommend the version installed with Microsoft 365. The other version is called OneNote for Windows 10 – this has slightly less functionality, but has an interface that is common across the other platforms, Mac, iOS, Android and web.
Work-based notebooks can be stored in OneDrive for Business and OneDrive can be used for your personal notes. The Microsoft 365 version of OneNote will allow notebooks to be stored in other locations, such as your local drive or a network drive, though they will not be available in the other platforms unless they use the OneDrive option.
Getting Started (Image 1)
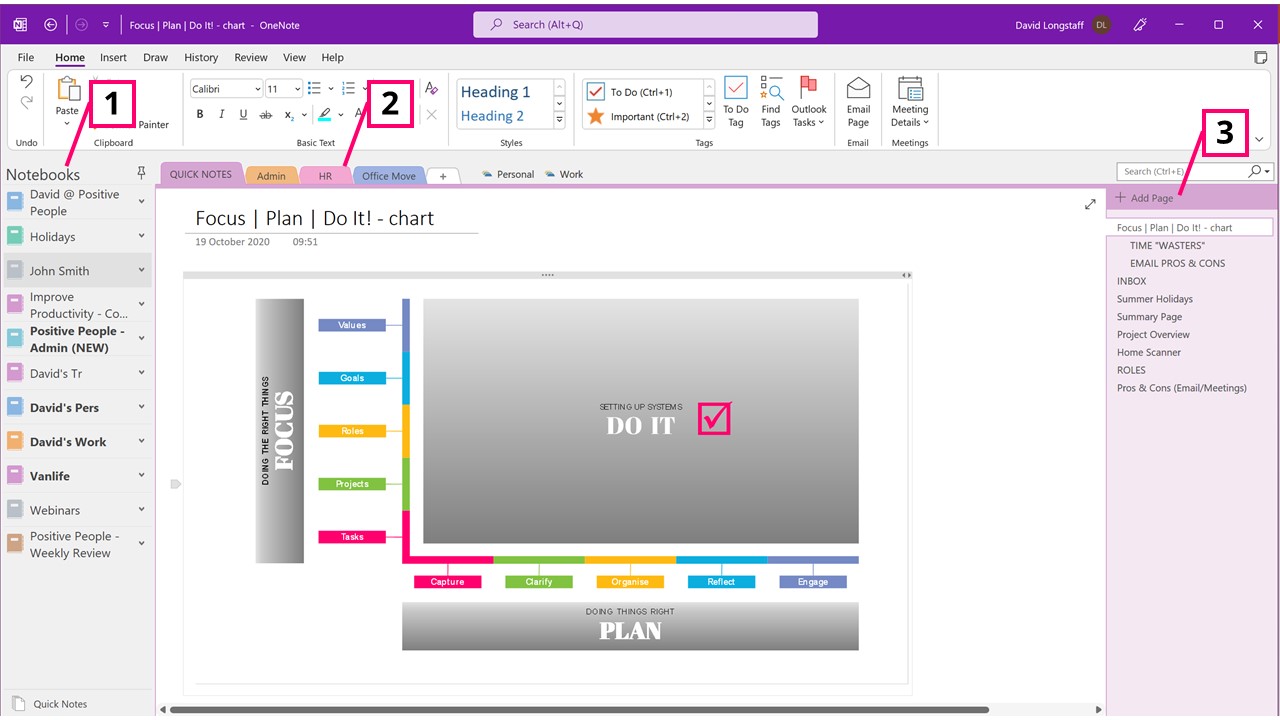
Organising Notebooks (Image 2)
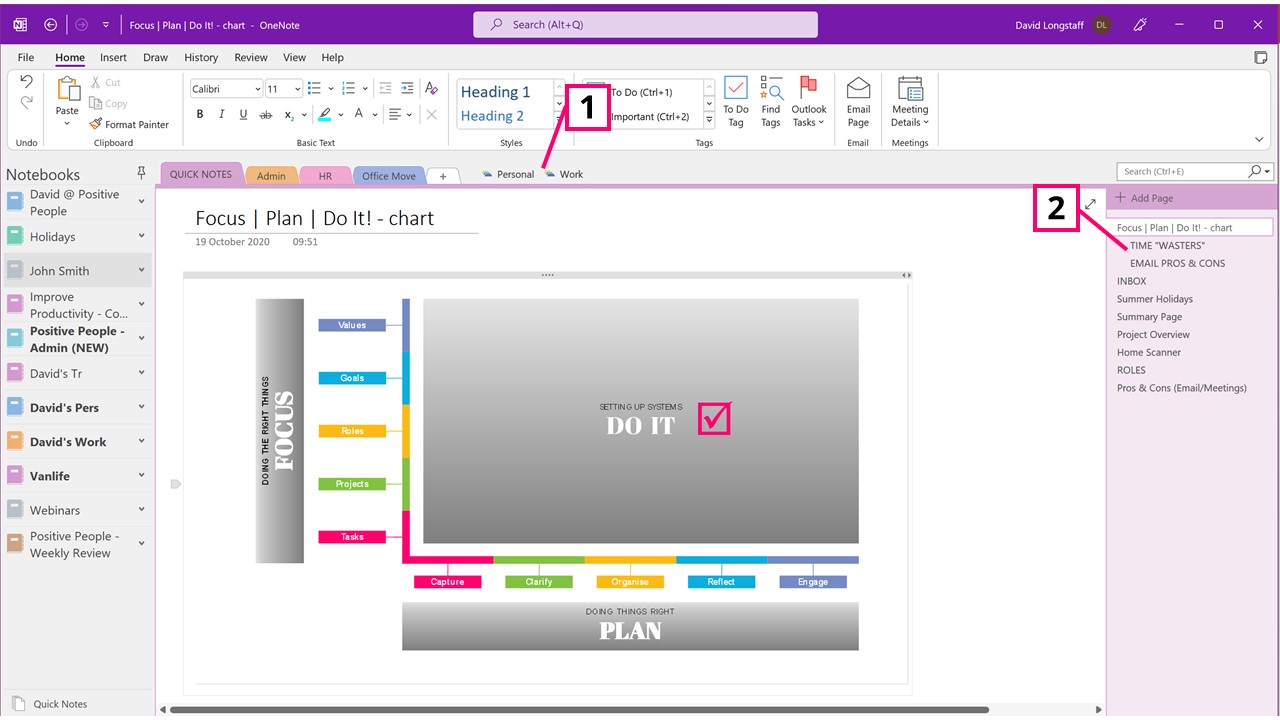
Organising Notebooks (Image 3)
2) Organising Notebooks
You will then want to create a notebook hierarchy to match the structure of your work life and possibly homelife. There is a default notebook (Image 2.1) where it is possible to create sections (Image 2.2) and pages (Image 2.3).
There are two additional, subtle levels. It is also possible to create section groups (Image 3.1) by right clicking to the right hand side of the existing sections.
Pages can also have sub-pages which are created by dragging a page to the right hand side under the root page (Image 3.2). Root level pages can be collapsed.
If a project or area is likely to be fairly small, a page or a few pages in a single section may be sufficient. If the project is bigger, it may be that it requires a section or even group of sections to handle it.
If the topic is so large, or may need to be shared with a specific group, it will likely deserve its own notebook. Setting the structure appropriately will be a big help later, although it is possible to move notes and sections into other notebooks later if needed.
3) Inserting Content
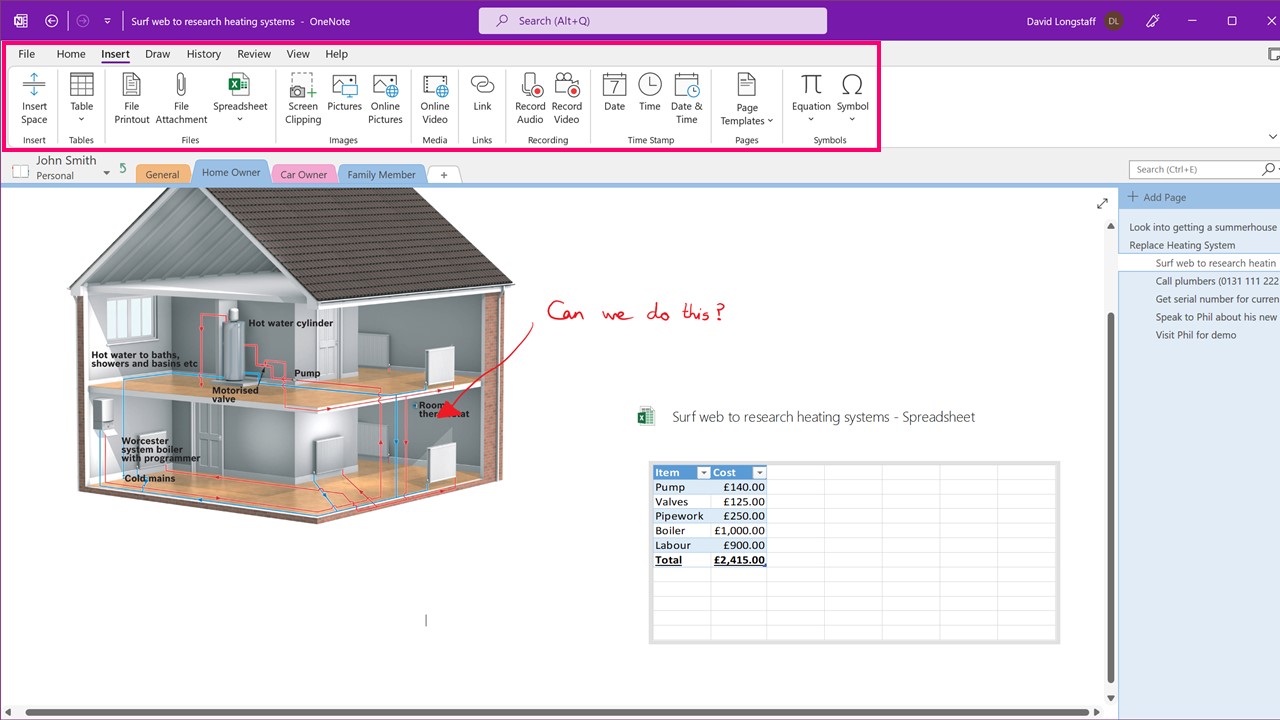
The power of OneNote comes from the rich content types that can be included. To review some of the key options, choose the Insert tab on the menu (Image 4) and try the options. The obvious methods are typing in content and grabbing images. It is also possible to include tables and spreadsheets – if the Excel spreadsheet is in OneDrive, if the original document is updated, the changes will be immediately reflected in OneNote.
From any application within Windows it is possible to print a document into OneNote. Simply choose Print and then change the printer to the OneNote printer (Image 5.1). The printout will be created and then OneNote will ask which notebook, section or page the document should be printed. Recent locations will be offered at the top or the pop-up, including as a new page in the current section or as an element in the current page (Image 5.2).
An additional clever feature is to record audio or video of an event (Image 6.1). This could be useful at presentations or in meetings as long as privacy policies are acknowledged. The recording is stored in the page (Image 6.2); OneNote options will allow the quality of the recording function to be adjusted. The higher the quality, the larger the file – though this may not present a major problem if the document is stored in OneDrive.
As notes are typed, they are time-stamped against the recording so that a clickable playback button is inserted next to the line of text which will fast-forward the recording and play it from the relevant section of the audio file (Image 6.3).
Inserting Content (Image 4)
Inserting Content (Image 5)
Inserting Content (Image 6)
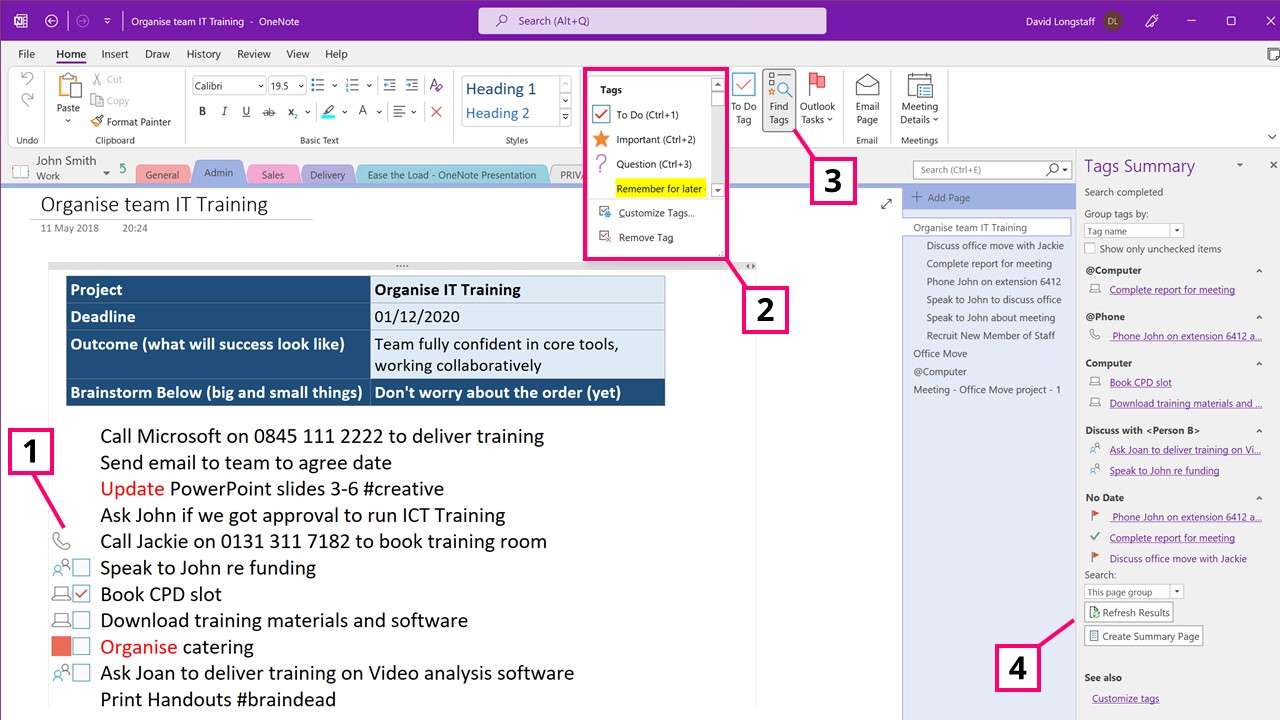
Using Tags (Image 7)
4) Using Tags
Tags can be used to organise content to review later (Image 7.1). Tags can be customised for your own preferences and include formatting and icons (Image 7.2). The To Do tag will also synchronise across platforms to allow tasks to be identified and marked as completed while on the go or even by collaborators of the notebook.
OneNote can also search tags (Image 7.4) and the scope can be increased or decreased across certain pages, sections or even all notebooks. A summary page can be created that includes the tagged items with hyperlinks to the original item.
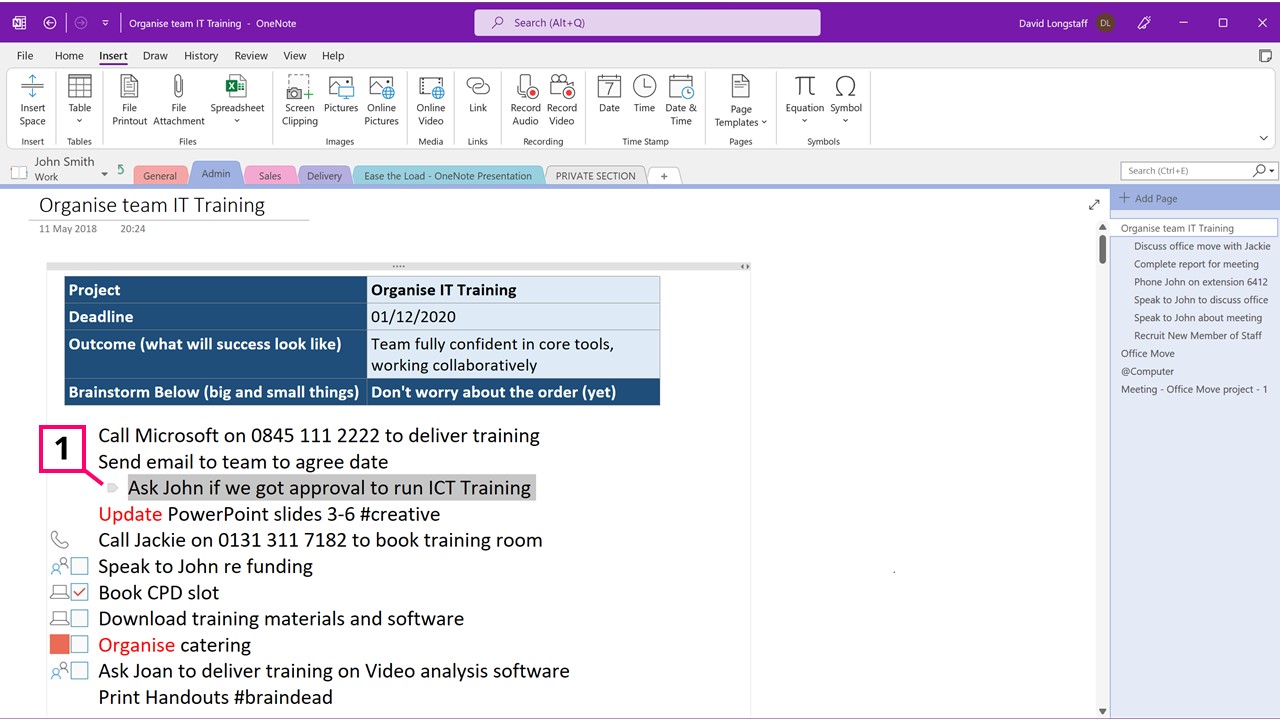
5) Drag and Drop
Unlike Microsoft Word which is quite structured in the typing layout, content can be moved anywhere around a page in OneNote, which can unnerving but a very useful feature when you get used to it.
For example, when brainstorming a project (see the Tasks section of the Focus framework), we may not have put the items in any order. When we identify the first action, we may want to bring that to the top of the page which can be done by dragging the grey handle around the page (Image 8.1)
Drag and Drop (Image 8)
Synchronising with Outlook Tasks (Image 9)
Synchronising with Outlook Tasks (Image 10)
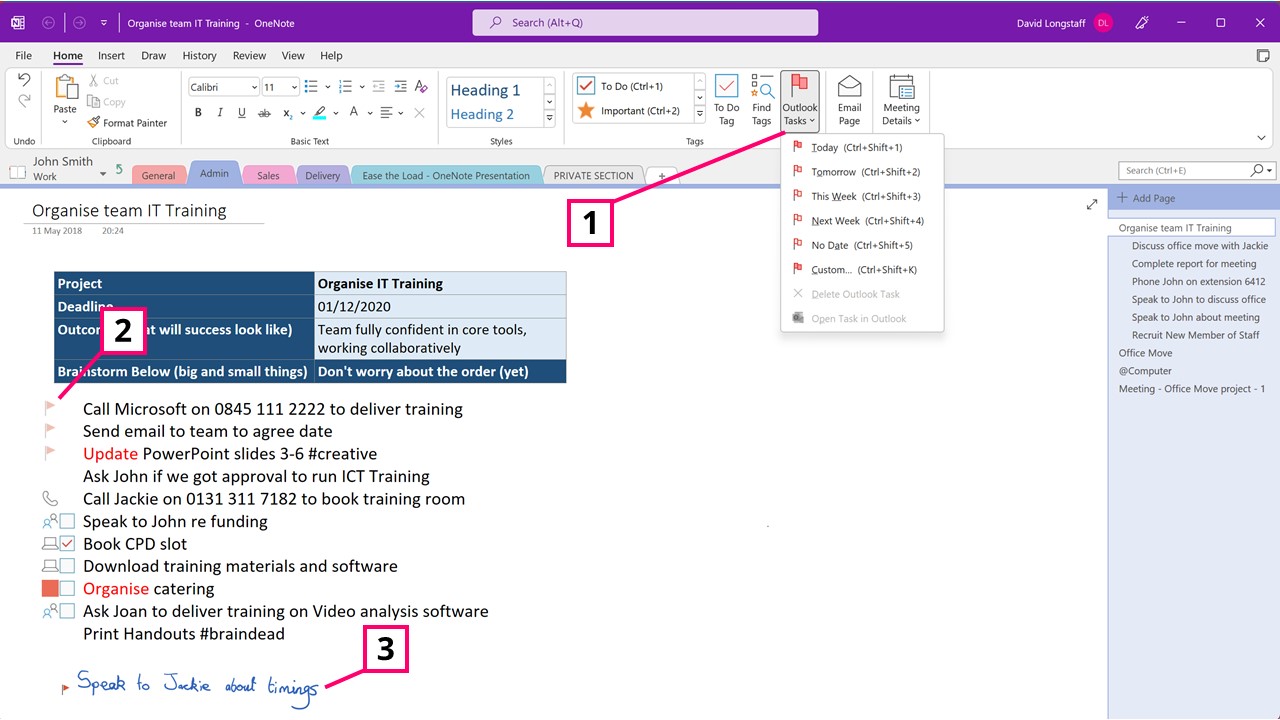
6) Synchronising with Outlook Tasks
The Microsoft 365 version has the ability to send content from OneNote into Outlook. Simply select the text and choose the Outlook Tasks option on the Home tab (Image 9.1) These items are given a flag in OneNote (Image 9.2) and sent to Outlook as tasks.
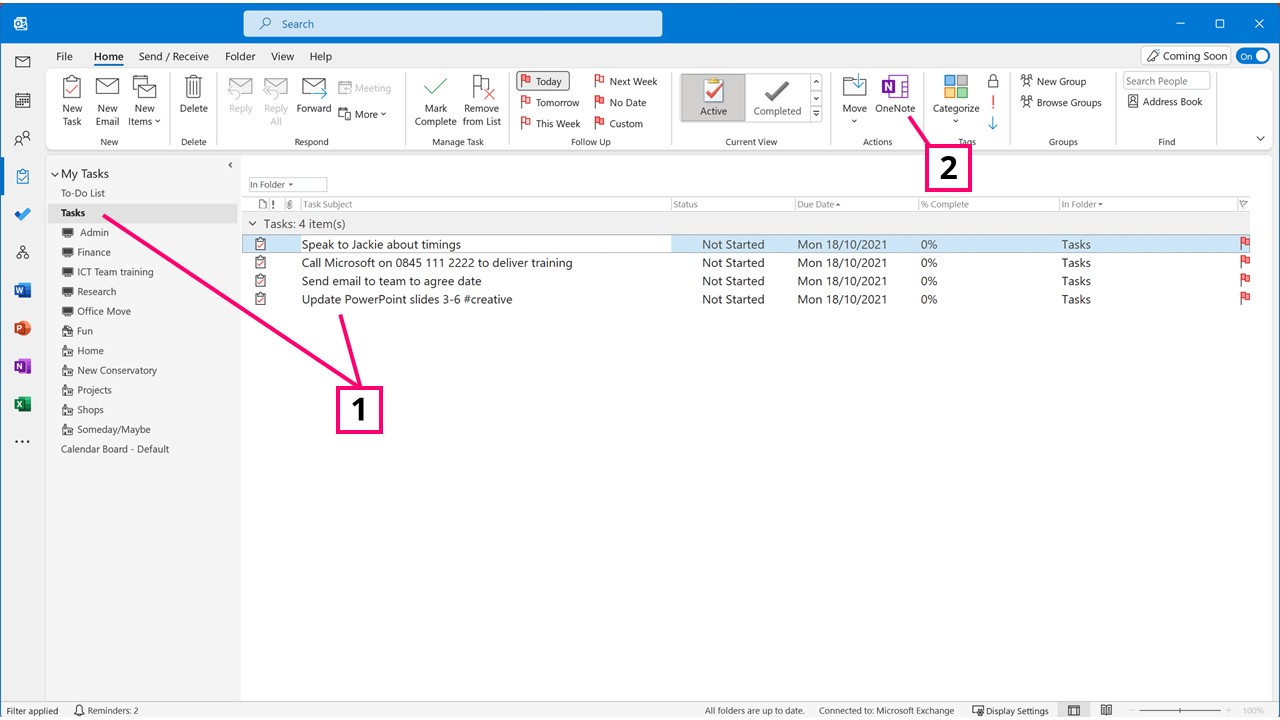
If you use a stylus with a Windows device (Image 9.3), the digital ink will be converted and sent to Outlook as a text task into the root task folder (Image 10.1).
Tasks in Outlook can also be sent to OneNote as content which can be inserted into its appropriate notebook (Image 10.2) As an aside, almost any Outlook content can be sent into OneNote, simply look for the OneNote icon in Outlook.
7) Outlook Meetings
Notes for Outlook meetings can also be created in OneNote and shared with the attendees. This can be particularly useful for distributing agendas and minutes of meetings.
To do this open the meeting appointment in Outlook and select the Meeting Notes option (Image 11.1) If you are the organiser of the meeting, you will be presented with two options (Image 11.2); “Share notes with the meeting occurrence” and “Take notes on your own”. This will then create a page and you will be asked where the page should be created. It will then embed a link to that page in the Appointment notes and as long as you have shared the notebook with attendees they will be able to access any changes and contribute to the page ahead of the meeting.
If you are not the organiser of the meeting you will only be able to choose “Take notes on your own.”
Outlook Meetings (Image 11)
Sharing Notebooks (Image 12)
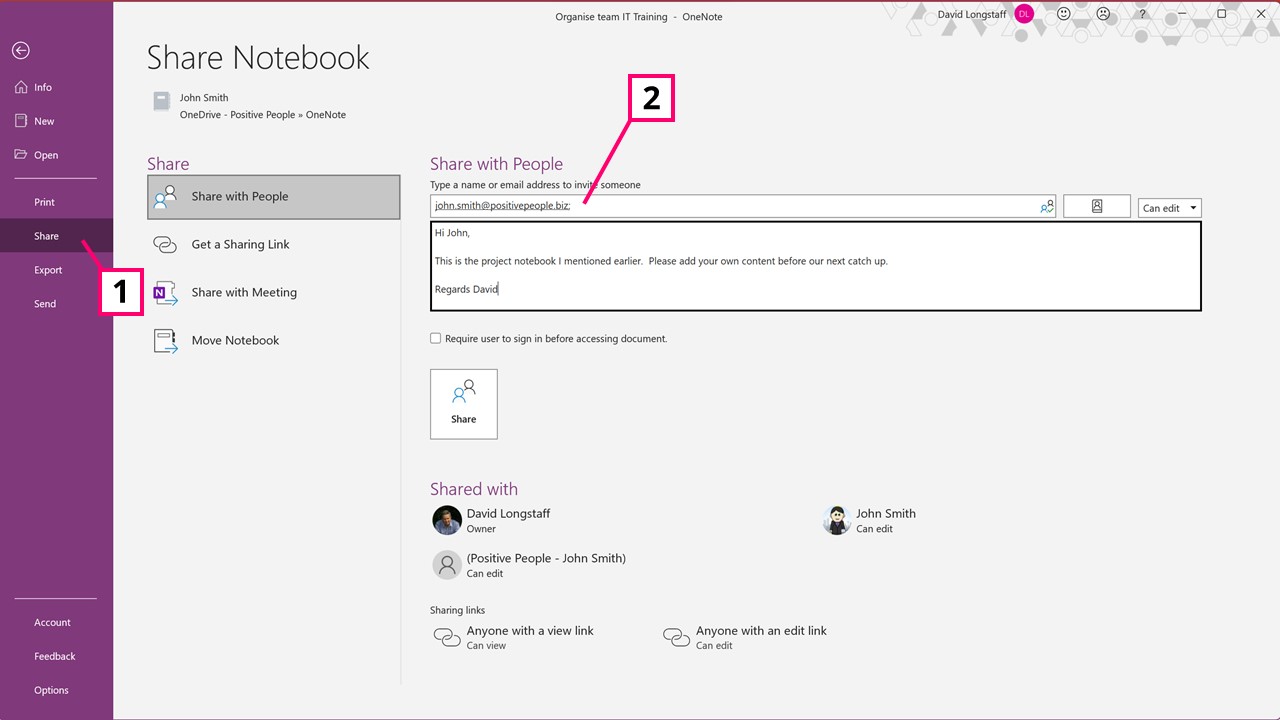
8) Sharing Notebooks
The real power of OneNote comes from using the tool to collaborate with a team. There are a number of ways to share the notebook; perhaps the easiest using the Microsoft 365 version is to select File then Share (Image 12.1). Names and email addresses are added in to the first text box (Image 12.2); you can then choose whether they are able to edit or only view the notebook.
This allows groups even across multiple organisations to collaborate on a large project. While OneNote is not strictly a project management tool, it is an excellent solution for project collateral.
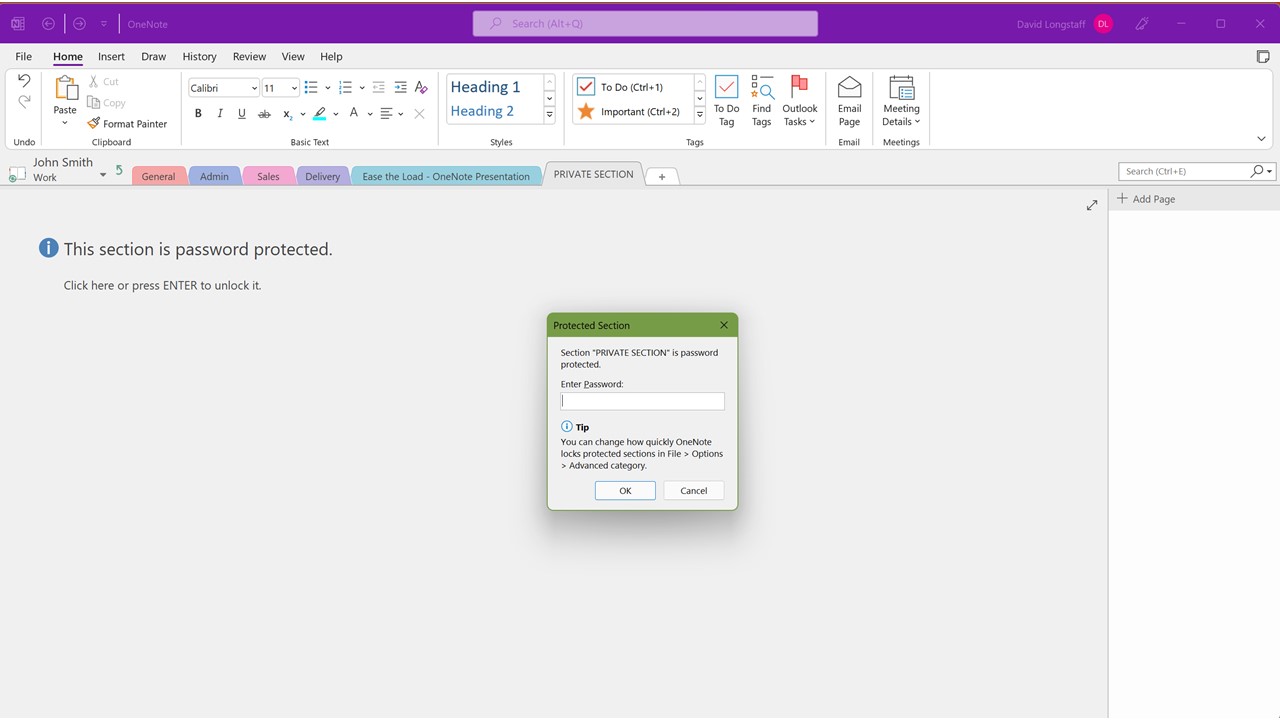
9) Password Protection
Generally speaking when Notebooks are created using the method in step 2 above, they are not visible to others. However, if a notebook is shared or if additional security is required, sections of a notebook can be password protected.
This uses AES encryption and will work across all platforms. Just remember that if the password is forgotten, there is no way to retrieve it.
Password Protection (Image 13)
OneNote has been around since 2003 and it is still an underused be incredible flexible and powerful tool. I would recommend including this in your armoury of tools as you implement the Focus | Plan | Do It! programme.