Planner is built on the Kanban approach (Japanese for signboard/billboard), which was devised by Toyota for building vehicles.
Kanban traditionally loads tasks in 3 columns; To Do, Doing and Done. All the tasks begin in the first column and are moved to the other columns as the work progresses. It’s a simply, visual approach that helps with workload balancing and could be implemented as simply as sticky notes on a wall.
However, there are a number of software solutions that accomplish the technique, including Trello, Asana, Basecamp, and many others. Planner is Microsoft’s answer to these tools and has the added advantage of being baked into the Microsoft 365 environment. Watch the video or use the guide below to help you use the solution for your team.
Microsoft Planner is available in various formats, on the web, within Teams and on Android and iOS. There is currently no Windows standalone app.
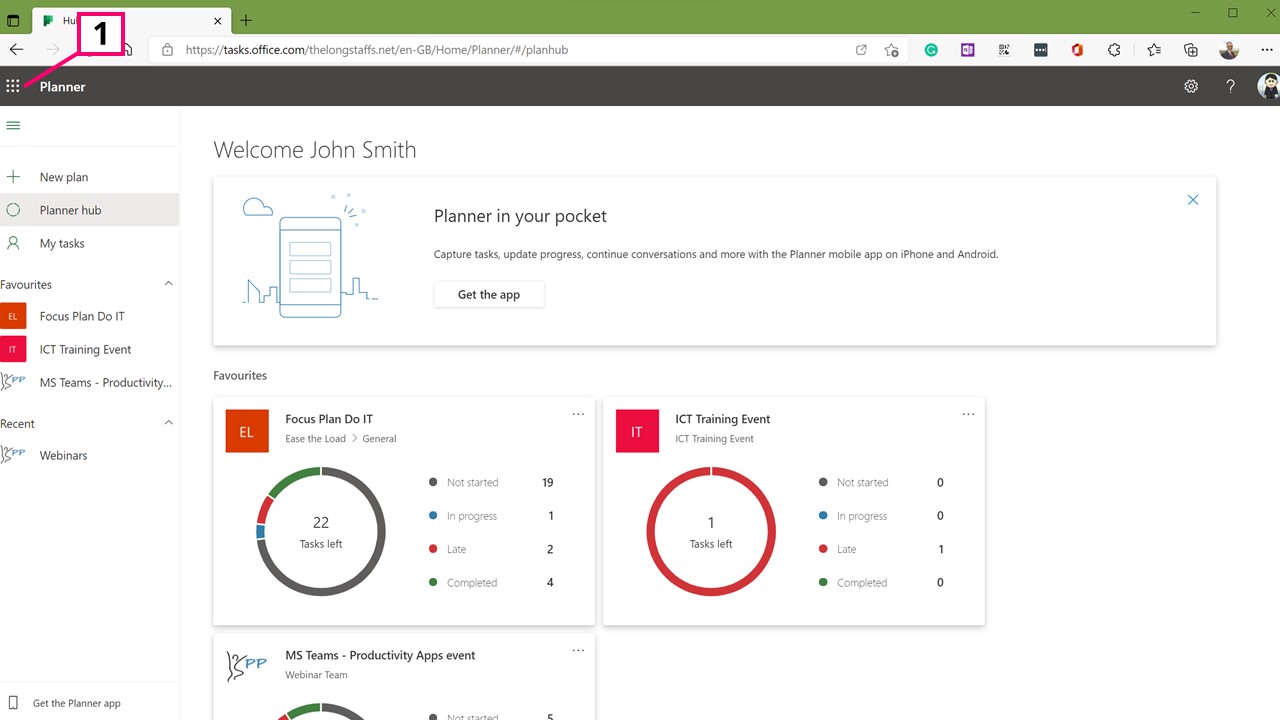
To launch it on the web, sign into the Office.com account and it is listed on the left hand side nav bar (Image 1.1). If you can’t see it listed, choose All Apps and scroll down until you find Planner.
To access it in Teams, search for the app entitled “Tasks by Planner and To Do”. The home page will list your plans and provide a dashboard or hub.
Launching Planner (Image 1)
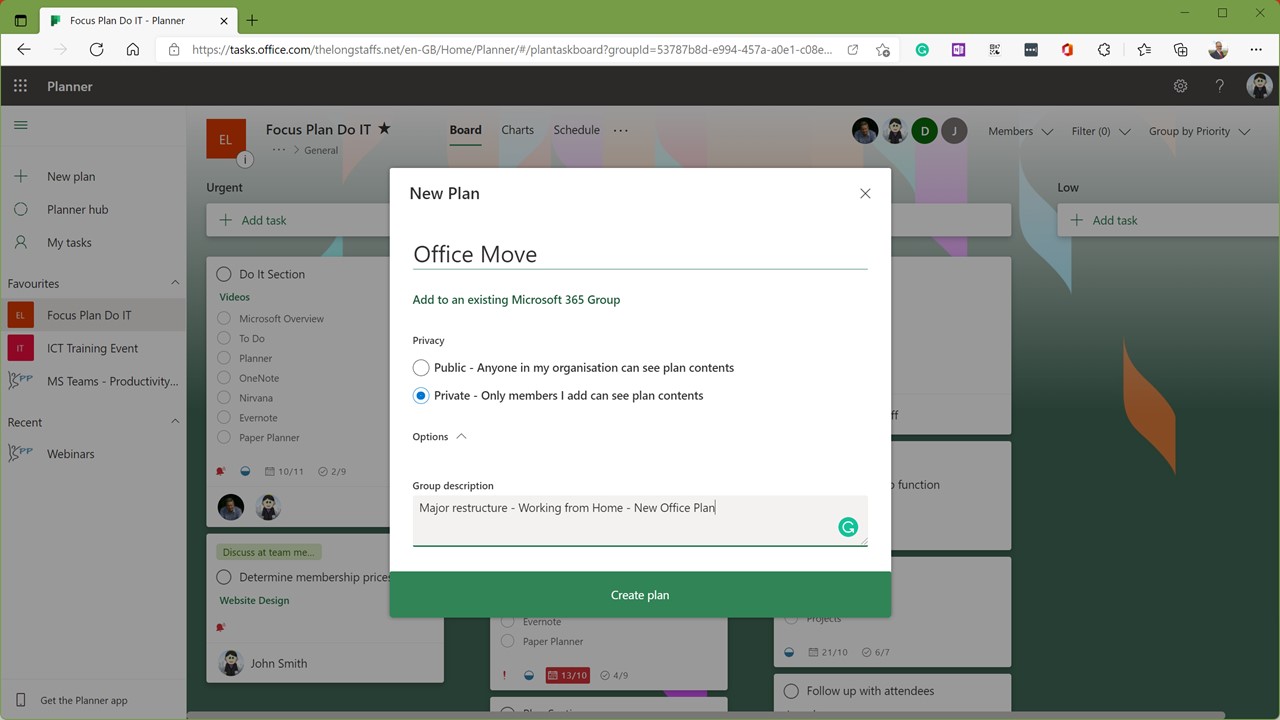
Creating Plans (Image 2)
2) Creating Plans
The left hand panel allows you to create a new plan (Image 2). Setting it to public will allow the plan to be viewed by all members of the organisation. A private plan is limited to members you choose.
Depending on your organisation’s settings, you may or may not be able to create a plan. As an aside, I recommend avoiding creating too many Microsoft 365 teams and channels; instead add your new plans to an existing group.
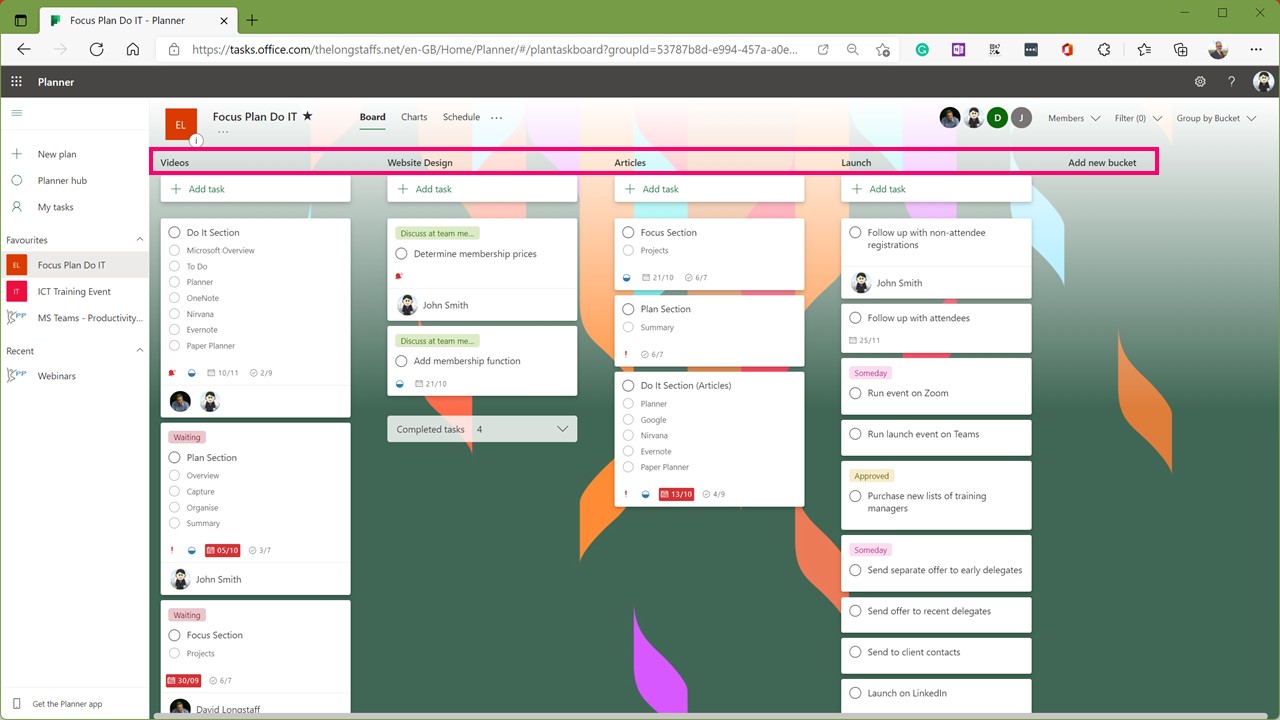
3) Buckets
The first stage is to create buckets which are the default swim lanes for your tasks (Image 3). The traditional Kanban would set the columns to:
To Do
Doing
Done
However, as there is a specific progress field built into Planner, I would recommend creating buckets around streams, areas of work or another suitable grouping for your project. You can create as many buckets as needed (up to 200 per plan).
Buckets (Image 3)
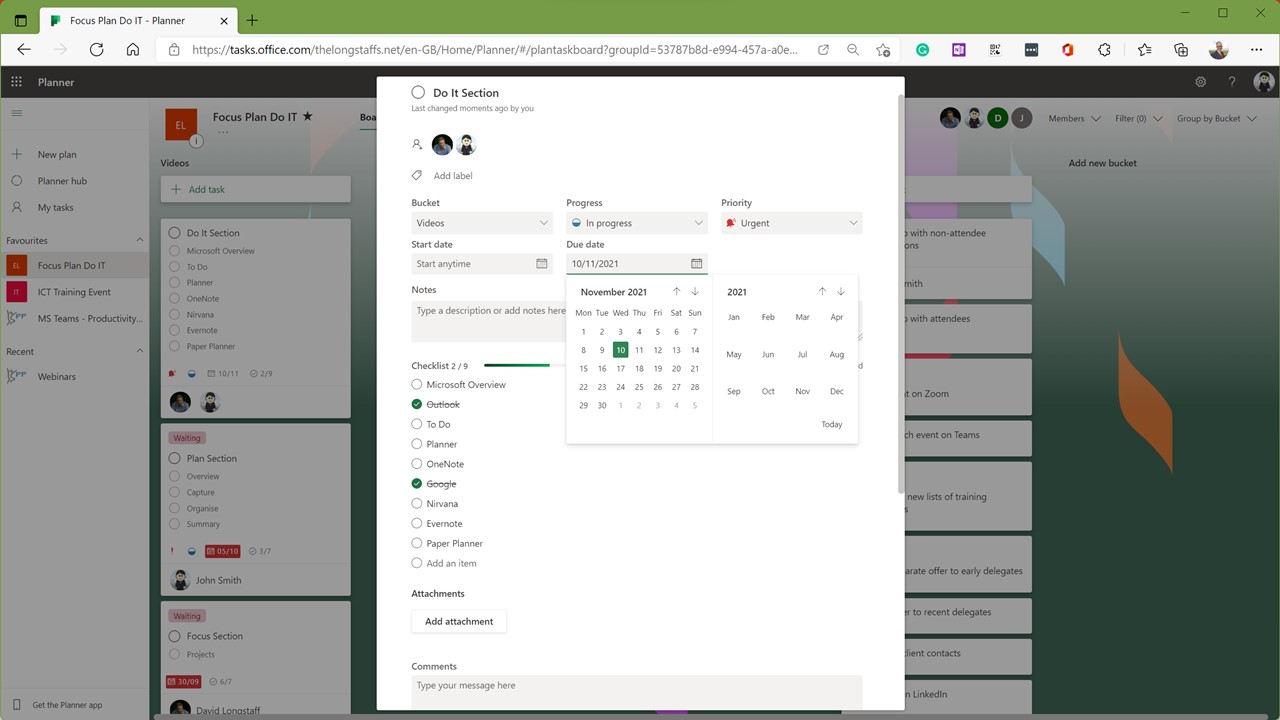
Adding and Editing Tasks (Image 4)
4) Adding and Editing Tasks
Tasks are added at the top of each column and include the standard fields you would expect from a task management system (Image 4). These include:
Task title
Assigned to
Labels
Start date
Due date
Status
Importance
Sub tasks
Attachments
Notes
Comments
5) Using Groups and Filters
A powerful feature in Planner is to be able to change the groupings and filters to visualise your tasks sorted by another dimension.
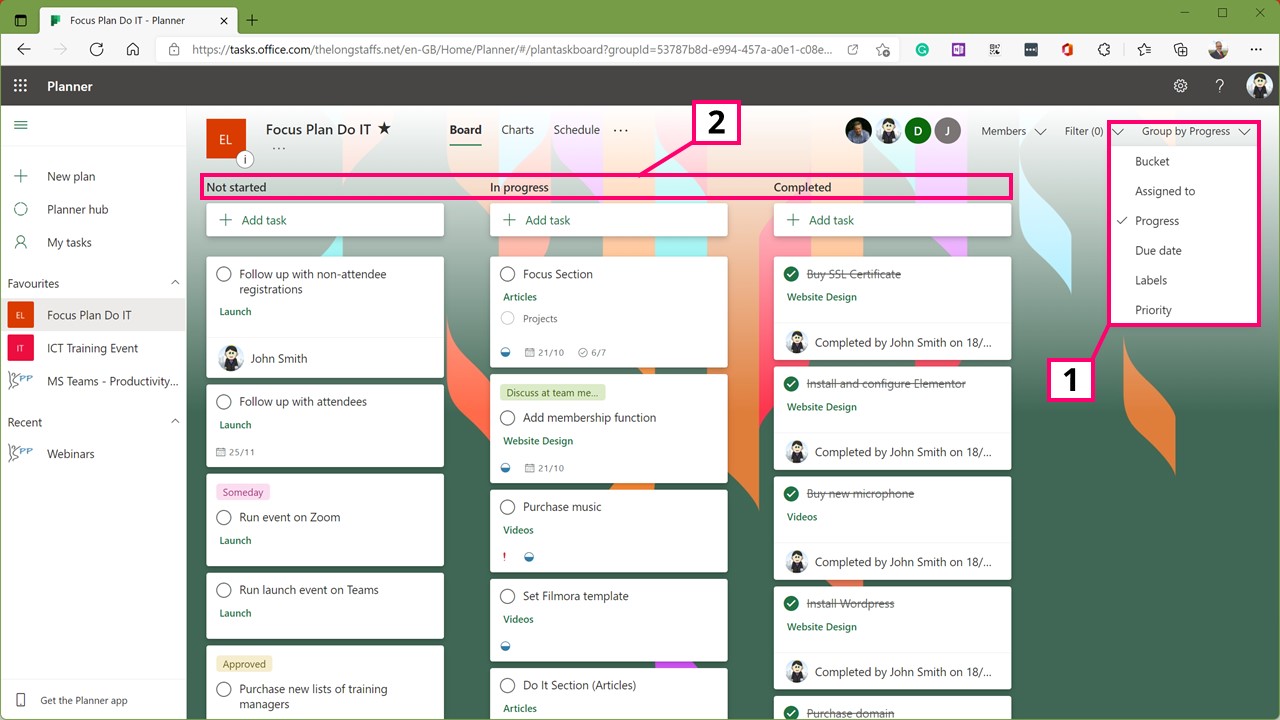
The groupings (Image 5.1) change the columns to allow you to arrange tasks by the bucket, person assigned, its due date, progress, label and priority.
For example, if the groups are changed to ‘by progress’ (image 5.2), this will change the columns to the traditional Kanban approach of To Do, Doing and Done.
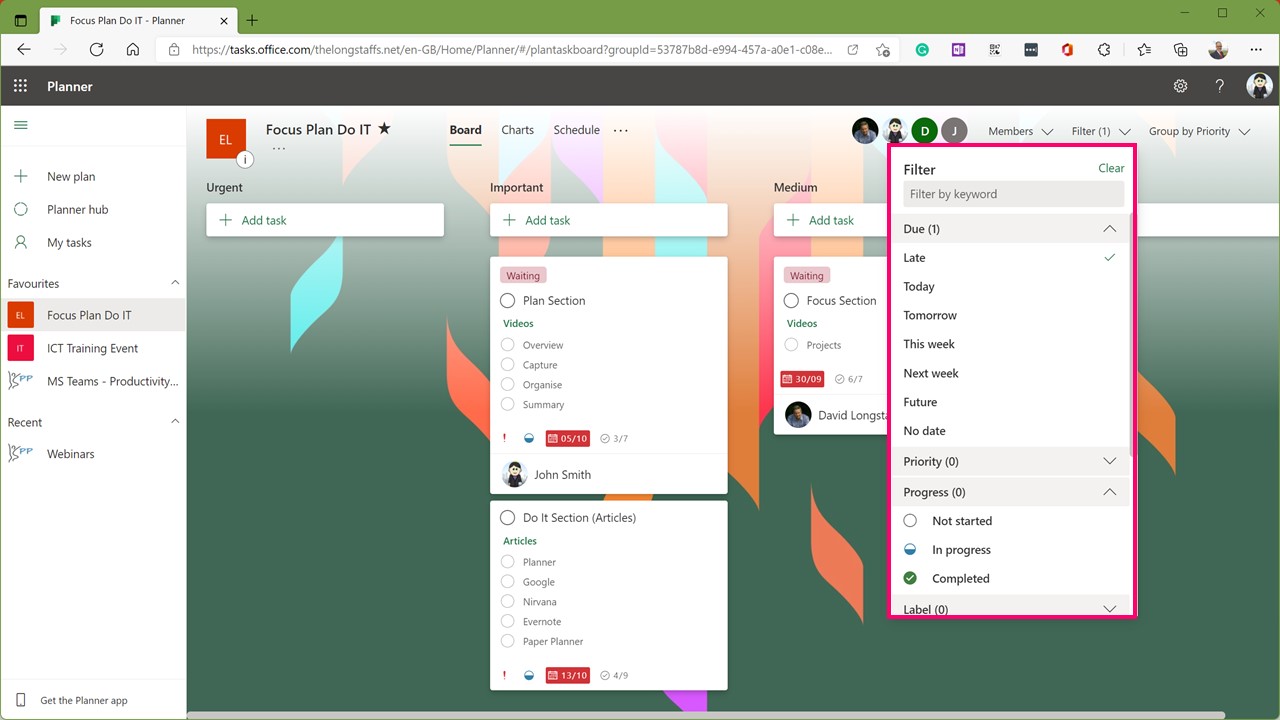
In addition, the columns can then be further filtered (Image 6) to only show items which are assigned to a specific person, has a due date range, progress status, label or priority.
This provides a flexible view of the project plan and can particularly be useful in update meetings.
Using Groups and Filters (Image 5)
Using Groups and Filters (Image 6)
Drag and Drop (Image7)
6) Drag and Drop
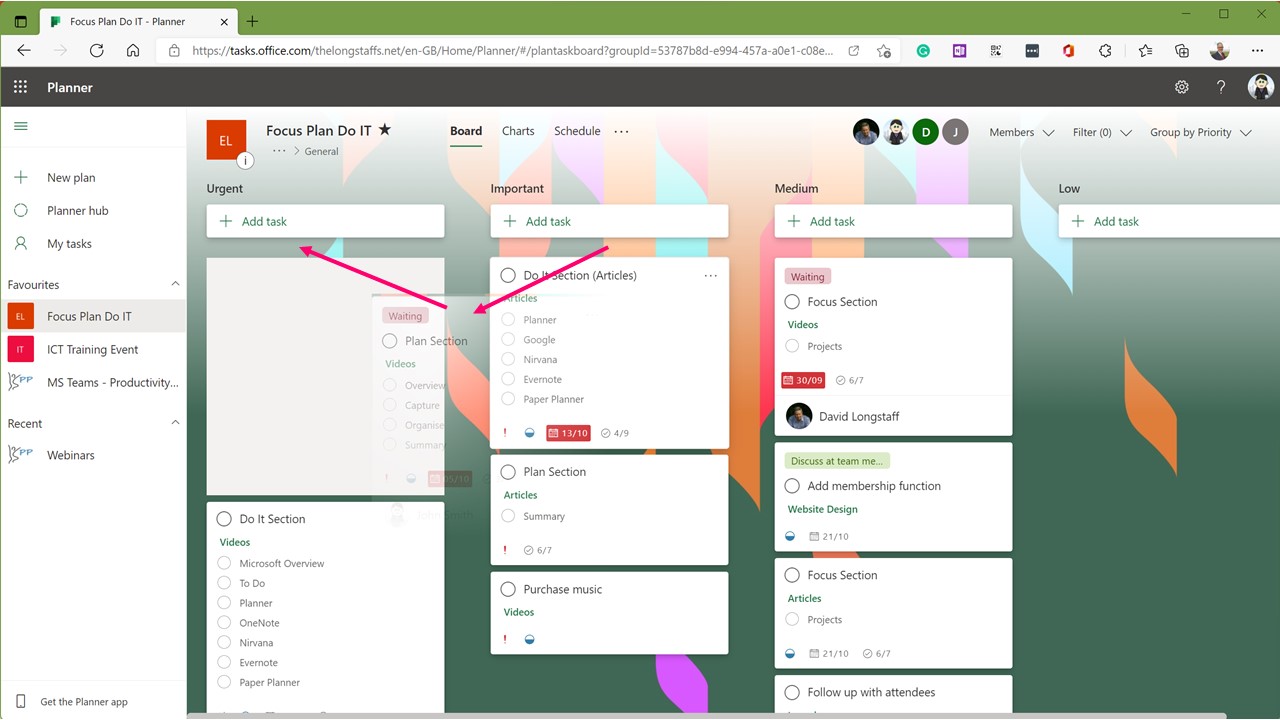
A task can easily be updated by moving it from one column to another using drag and drop (Image 7). This allows a quick and visual update to task details.
Of course, it is also possible to simply open the task and adjust the fields from the task detail.
7) Charts
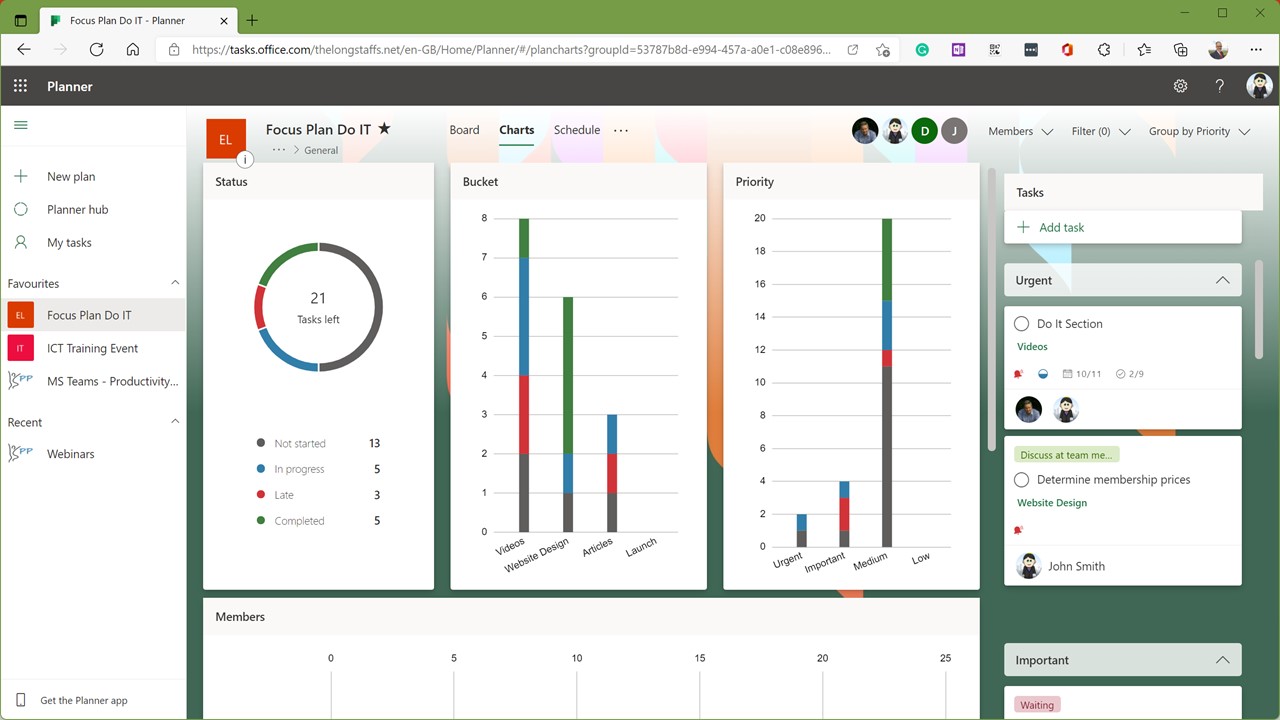
In addition to the Boards view, Planner also offers some basic charts (Image 8). These offer a quick visual representation of the project status, highlighting if there are any bottlenecks or if the project is on track.
The charts view can also be filtered and grouped.
Charts (Image 8)
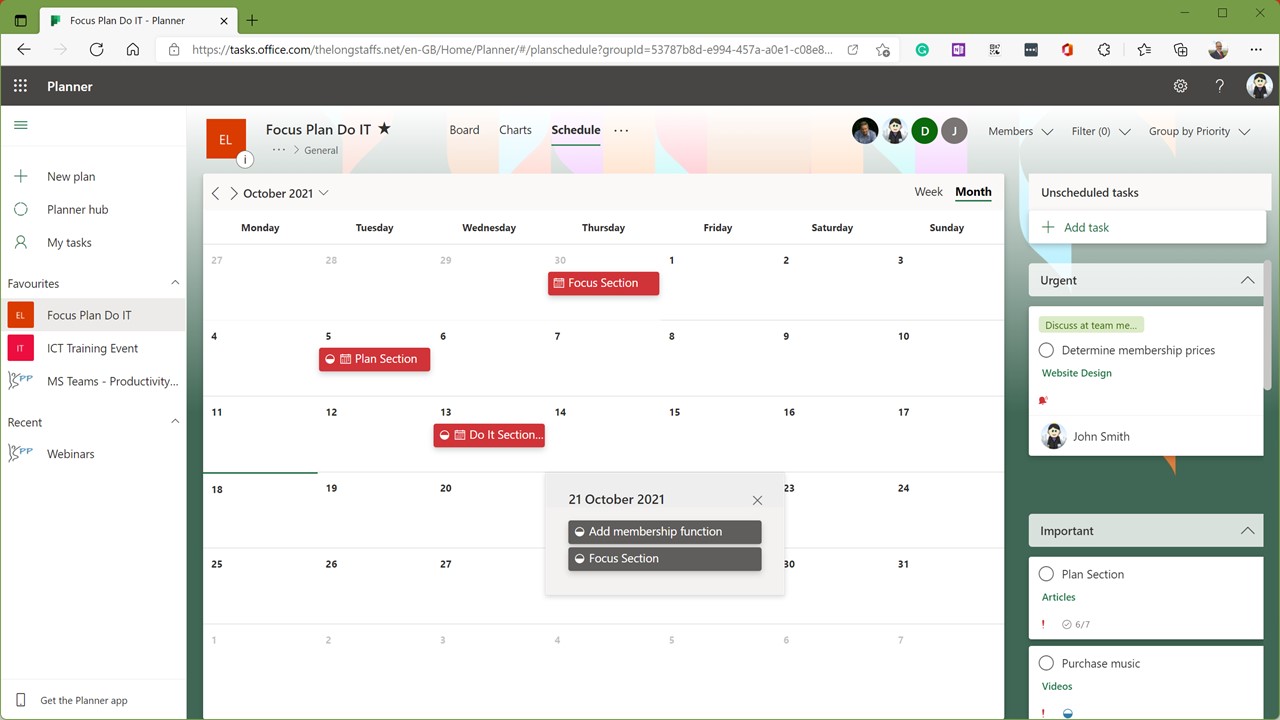
Schedule View (Image 9)
8) Schedule View
The final view is a schedule overlay that allows tasks to be shown in a calendar grid allowing a quick visual representation of upcoming due tasks. (Image 9).
From the 3 dots at the top of the screen, the plan can be added to the Outlook calendar as an overlay.
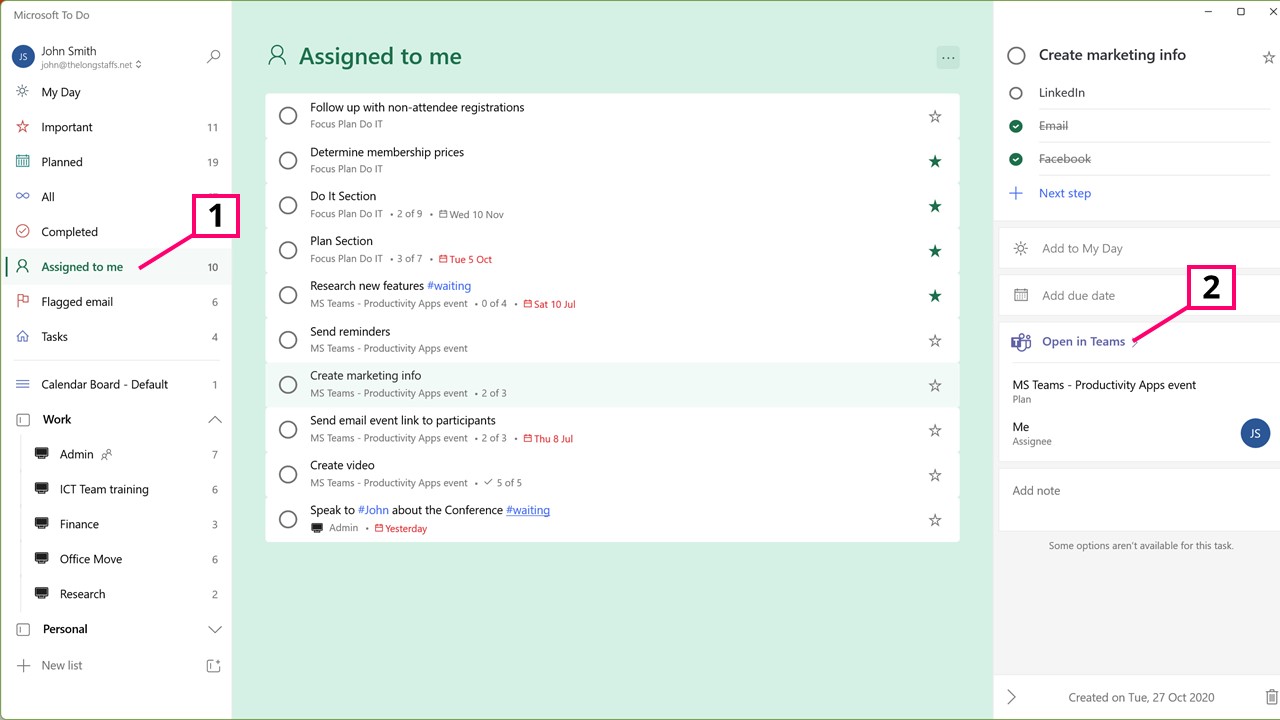
9) Microsoft To Do Integration
Any task in Planner that has been assigned to you, can be displayed in Microsoft To Do in the “Assigned to You” section (Image 10.1).
When the task is expanded, a link to open the item in Microsoft Teams is shown (Image 10.2).
Microsoft Planner has been around since 2016 but originally not that popular. I think it’s a great tool but to make it effective, you’ll want the whole team to be dipping in and out of it regularly. To do that requires brief training, maybe this article will be enough.
Microsoft Planner fits with the model in this programme and it’s an excellent tool to help your team manage their work effectively.